Saturday, February 10, 2007


(Almost) Instant Gratification Hat

Materials and Equipment
Crochet hook sized N
1 1/2 skein of Yarn Bee’s Mosaic Twist (tangy clay #117 used in model)

Gauge: Rounds 1-2 = 4 inches


Directions
Ch 4
Round 1: 12 dc in 4th ch from hook. Sl st to close this and all rounds.
Round 2: Ch 2. This doesn’t count as the first stitch. 2 dc in each stitch. 24 dc
Round 3: Ch 2. 2 dc in 1st stitch, dc in next stitch. (2 dc in next st, dc in next st) around 36 dc
Round 4: ch 2. 2 dc in 1st stitch, dc in each of next 8 dc. (2 dc in next st, dc in each of next 8 dc) around. 40 dc.
Round 5: Ch 2. Work even in dc. 40 dc.
Round 6: Ch 2. Skip first st, dc in next st. Now go back and dc in skipped st. Stitches form an “X” shape. (Skip the next st, dc in following st, go back and dc in skipped st) around. 20 “X” stitches formed by the 40 dc.
Round 7: Work even in sc. 40 sc.
Round 8: Repeat Round 6.
Round 9: Repeat Round 7.
Round 10: Repeat Round 6.
Round 11: Ch 2. Work one round of dc in front loops.
Round 12: Do not ch. Turn work. (Skip 2 dc, work 6 dc in space between 2nd skipped dc and next dc. Skip 2 dc, sl st between 2nd skipped dc and next dc.) around. 20 scallops formed.

Cut yarn and weave in loose ends. Fold hat along bottom of Round 11 to form brim.

NOTE: I’m not much for wearing hats. But if I do wear one, I prefer that it have a loose fit so this hat fits loose around my head. If you prefer a closer fit, try using hook sized L or M or you can adjust the pattern as follows: Work Round 4 even in dc. The rest of the pattern will work as written except that you will have 36 stitches instead of 40, Round 6 will result in 19 “X” stitches being formed, and on Round 12 you will have 19 scallops formed.

Monday, January 15, 2007


Diagonal Scarf

Materials and Equipment
3 balls of Noro Kureyon
knitting needles size 13
sewing needle

Gauge: not important

Note: Any size needle that works with worsted weight yarn can be used since the width is set whenever the knitter decides.

Directions

Setting the stage
CO 3 stitches.
Row 1: Knit
Row 2: Inc in first stitch, K1, M1, K last stitch
Row 3: Knit
Row 4: K1, inc, k to last stitch, M1, K last stitch
Row 5: Knit
Repeat Rows 4 and 5 until scarf is as wide as you would like it to be. Make sure you end with a knit row. I stopped when I reached 27 stitches.

Knitting the scarf
Row 1: K1, inc, K to last three stitches, dec, K last stitch
Row 2: Knit
Repeat these two rows until scarf measures 60”-65” from beginning to higher end of the diagonal. Make sure you end with a knit row.

The Big Finish
Row 1: K1, dec, knit to last three stitches, dec, K last stitch
Row 2: Knit
Repeat last two rows until there are five stitches left. End with a knit row.
Next row: Dec, dec, knit last stitch
Knit one row.
BO and weave in loose ends.

Friday, January 12, 2007


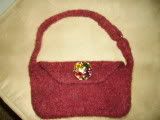
Lyd’s Purse

Materials and Equipment
Crochet hooks sized J, P
Knit Picks Wool of the Andes (50g/110 yds), 4 balls in color of choice
Magnetic snap
Decorative pin

Gauge: 7 hdc = 2 inches
5 rows = 2 inches

Note: Beginning ch 2 DOES NOT count as 1st hdc.


Directions

Bottom of purse:
Ch 42
Row 1: Hdc in 3rd ch from hook and in each ch across. 40 hdc.
Row2-7: Ch 2, hdc in each hdc. 40 hdc. Do not cut yarn.

Purse:
Round 1: ch 2, hdc in end st of each row (7 hdc), hdc in each st on opposite side of beg ch (40 hdc), hdc in end st of each row (7 hdc), hdc in each st of row 7 of bottom of purse. 94 hdc.
Rounds 2-20: Ch 2, hdc in each hdc. Sl st to top of first hdc to close round. 94 hdc. Cut yarn at end of round 20.

Flap:
Row 1: Join yarn with hdc in 23rd st of the round. Hdc in next 39 hdc. 40 hdc.
Rows 2-19: Work even in hdc. 40 hdc.
Row 20: Sl st in 1st hdc, skip next hdc, 4 dc in space between next 2 hdc, (skip next 2 hdc, sl st between next 2 hdc, skip next 2 hdc, 4 hdc in space between next 2 hdc) 9 times. Sl st in top of last hdc. 10 shells made. Cut yarn and weave in loose ends.

Strap:
Holding 3 strands of yarn together and hook size P, ch 100. Sl st in 2nd st from hook and in each ch. Cut yarn. Chain more than 100 if you’d like a longer strap.
Felt strap and purse according to your favorite method.

Finishing:
Use scissors to poke a hole 3/4 inch from top of purse on one side. Thread end of strap through the hole from the outside in. Tie end of strap in an overhand knot inside purse. Repeat this for attaching strap on opposite side of purse.
Attach magnetic snap to purse. Attach decorative pin to hide back of snap.

Tuesday, January 09, 2007

Some Finished Projects


Some Finished Projects

Monday, January 01, 2007


Bufanda de cuatro horas


**Someone in Mexico e-mailed me and asked if I could translate my pattern into Spanish. Here it is. I know there are mistakes since translating my patterns is not something I ordinarily do. The person in Mexico understood my translation so I guess it's passable. However, it makes me think that I should consider doing this to all my patterns.***


Materiales y Herramientas

3 oz de estambre “worsted weight” en cólor negro3 oz de estambre Red Heart Plush en cólor negro

1 a 2 oz de estambre “eyelash” (como cejas) en cólor dorado

1 a 2 oz de estambre “eyelash” (como cejas) de cólor plateado

Aguja de ganchillo tamaño P


Nota: Para cambiar estambres para las rayas, haga un punto alto doble con los estambres negros, dejando dos anillos en el ganchillo, deje el estambre “Plush” y sigue con el estambre “eyelash” (como cejas) y el estambre “worsted weight”.


Direcciones:

Comenzando con los estambres negros, haga un cadeneta de 18.
Vuelta 1: Haga un punto alto doble en el 4o cadeneta desde el ganchillo y en cada cadeneta que sigue. 15 puntos altos dobles.

Vuellta 2: Haga 3 cadenetas. Estas 3 cadenetas son el primer punto alt doble. Haga un punto alto doble en cada punto. 15 puntos altos dobles.

Vuelta 3: Repite Vuelta 2. Cambia el estambre “Plush” por el estambre plateadoen el el ultimo punto.

Vueltas 4-5: Sigue tejiendo estas vueltas con puntos bajos. 15 puntos bajos. A terminar vuelta 5, cambia el estambreplateado por el estambre “Plush.”

Vueltas 6-7: Repite Vueltas 2 y 3. A terminar vuelta 7, cambia el estambre “Plush” por el estambre dorado.

Vueltas 8-9: Repite Vueltas 4-5. 15 puntos bajos. A terminar vuelta 9, cambia el estambre dorado por el estambre “Plush.”

Vueltas 10-52: Continua tejiendo con puntos bajos. 15 puntos bajos.

Vuelta 53-54: Repite Vueltas 8-9. 15 puntos bajos.

Vueltas 55-56: Repite Vueltas 2 y 3. 15 puntos altos dobles.

Vueltas 57-58: Repite Vueltas 4-5. 15 puntos bajos.

Vueltas 59-61: Continue tejiendo con puntos balos. 15 puntos bajos.

Corte el estambre y esconde los lados del estambre en el revés del labor.

Firecracker Scarf
Materials and Equipment
1 skein of Colinette Firecracker (100 g/70 m) in color of your choice (florentina used in this case)
size 19 straight knitting needles

Gauge: not important for this project

NOTE: You can substitute 1 skein of Yarn Bee's (Hobby Lobby's brand) Beguile yarn in place of Colinette for about 1/5 the cost.

Directions

CO 10 stitches. Work in garter stitch until there is one yard of yarn left. BO. Weave in loose ends.

Sunday, December 31, 2006


Change Purse

Materials and Equipment:
Sensations “Smania” yarn – one ball makes about 3 purses
Crochet hook size K
Fabric for lining, optional

Gauge: does not matter

Directions:
Ch 15
Row 1: Sc in 2nd ch from hook and in each ch. 14 sc.
Rows 2-28: Ch 1, sc in each sc. 14 sc.
Fold in half and sc closed from row 2 until fold on each side of purse. Do not crochet first and last rows. Leave first row and last row to form opening.
Drawstrings: Take 30” length of yarn and cut in half. Beginning on one side of change purse, weave in and out between stitches in unworked rows of opening. Tie in overhand knot. Trim ends of yarn. Take second length of yarn and repeat beginning on other side of change purse.
Sew in fabric lining if desired.

Friday, December 29, 2006


Felted Drawstring Purse

Materials and Equipment:
size 13 straight needles
2 straps, each about 1 1/2 yards in whatever material you like
1 scrap of ribbon about 2 yards long
safety pin
Gauge (in stockinette stitch): 6 sts - 2" and 7 rows = 2"
CO 40 stitches
Work in stockinette stitch until you have three yards of yarn left. BO and use remaining yarn for sewing seams. Fold about 1 1/2 inches of BO and CO edge to wrong side (purl side) of knitting to form drawstring tunnel. Fold entire piece in half with right sides (knit side) facing and sew side seams stopping at the drawstring tunnel. Turn purse right side out. Use a safety pin to draw ribbon through drawstring tunnel on each side of purse. Tie ends together. This will ensure that the knitting doesn't felt onto itself and close the tunnel. Felt the bag according to your preferred method. I used a combination of machine and hand felting since the yarn took so long to felt. Let purse dry and remove the ribbon. Use the safety pin to draw one strap through both drawstring tunnels and the other strap through the drawstring tunnel in the other direction. Sew or tie the ends of the strap depending on the material used for the straps. I used some vinyl stuff with silver grommets I found at Jo-Ann.

Thursday, December 21, 2006


Fingerless Gloves

this pattern of mine is a variation on this pattern >>>> http://www.zenknit.com/mitts.html

Equipment and Materials:
1 skein (50 grams/100 meters/109 yards) of Classic Elite Inca Print yarn in color of your choice
****I used just about every inch of this yarn making these gloves that fit a medium-sized woman's hand****
dpn size 6 (set of 4 or 5)
stitch markers (1 split ring and several locking)
stitch holder

Gauge:
(in stockinette stitch) 11 st = 2 inches

Cuff:
CO 40 stitches
Work 20 rows of k2 p2 ribbing. Use a locking stitch marker to mark the beginning of the round.
Now work 8 rows of knit sitches.

Thumb shaping:
Inc in first st (and place locking stitch marker on first stitch), k4, inc in next stitch, place split ring marker on needle, knit the remaining stitches.
Knit the next row.
Inc in first st, knit to stitch before marker, inc in that stitch, slip marker, knit the remaining stitches.
Knit the next row.
Repeat the last two rows until you have 18 stitches between the markers.
Next row: K1, slip the next 16 stitches onto a stitch holder. Knit the remaining stitches.
Place locking stitch marker on first stitch after the thumb stitches on the holder.
Knit 10 rows.
Work 8 rows of k2 p2 ribbing. BO

Thumb:
Knit the 16 stitches off the stitch holder, dividing the stitches evenly among the dpns. pick up and knit two stitches from the edge between the mitt and thumb. Knit one row. On next row, dec two stitches at the joining between the mitt and thumb.
Work 5 rows of k2 p2 ribbing. BO
Weave in loose ends.

Gloves can be adjusted for larger or smaller hands. Just remember that the number of stitches in the ribbed sections must be in multiples of 4 for k2 p2 ribbing.

Monday, November 06, 2006


Nora's handbag

i just finished this little purse for my cousin for her birthday. man, i like how knit picks wool of the andes yarn felts. this purse turned out about half the size it was before felting. i'm about to get started on a semi-circle purse in the same color (black cherry) as this one. if i can remember the pattern for this purse, i'll post it soon. i'll call it nora's handbag. the pattern for the semi-circle one i PROMISE to write as i go along so i can post it.

Monday, October 09, 2006


Getting felt up...
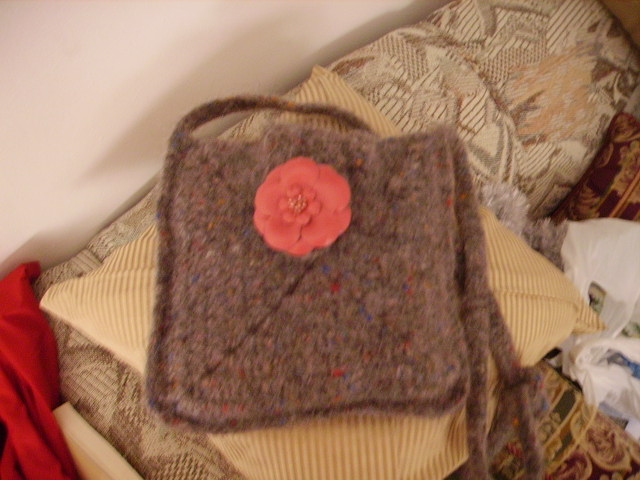
well, not exactly. here's a pic of my first foray into the world of felting. it's a simple square purse that i crocheted with reynold's icelandic lopi wool yarn. i had such fun felting that i'm going to make more purses and bags. i just ordered this pattern and this pattern and the necessary yarn from knitpicks.com. i'm all giddy with excitement about receiving my yarn.

Thursday, October 05, 2006


Bright Granny Square Scarf

Materials and Equipment
1 ball each of Bernat Softee Yarn in the following colors:
(A) Hot Pink
(B) Hot Blue
(C) Hot Orange
(D) Hot Lime

Crochet hook size K

Gauge: 1 square = 5 ½ inches

Note: You will be making 12 squares in total in the following color order:
3 of Square 1 – Round 1 (A), Round 2 (B), Round 3 (C), Round 4 (D)
3 of Square 2 – Round 1 (B), Round 2 (C), Round 3 (D), Round 4 (A)
3 of Square 3 – Round 1 (C), Round 2 (D), Round 3 (A), Round 4 (B)
3 of Square 4 – Round 1 (D), Round 2 (A), Round 3 (B), Round 4 (C)

Directions

For each square:
Chain 4
Round 1: With first color, work [3 dc, (ch 2, 4 dc) 3 times ch 2] in 4th ch from hook. Join with sl st to top of beg ch 4. Cut yarn.
Round 2: Join next color with a dc in any ch 2 space except for last ch 2 space made. Work [1 dc in same ch 2 space, 1 dc in each dc, (2 dc, ch 2, 2 dc) in ch 2 space] 3 times, 1 dc in each remaining dc, 2 dc in first ch 2 loop, ch 2, sl st to top of beg dc. Cut yarn.
Round 3: Repeat Round 3 with next color. Cut yarn.
Round 4: Join next color in first dc after a ch 2 space, (sc in each dc, 3 sc in each ch 2 space) around. Cut yarn.

Sew squares together in the following order: 1-2-3-4-1-2-3-4-1-2-3-4

Edging:
Round 1: Join hot pink in any corner sc or scarf, work sc in each st and 3 sc in each corner sc. Join with sl st to top of first sc. Cut yarn.
Round 2: Join hot lime with dc in any corner sc, ch 2, dc in same st, **(ch 1, skip next st, dc in next st) to next corner. Work (dc, ch 2, dc) in corner. Repeat from ** around. End with ch 1, sl st in top of first dc. You may have to adjust st to get the ch 1 spaces before each corner. Cut yarn.
Round 3: Join hot blue with dc in any corner ch 2 space, 2 dc in same space. (Dc in each ch and dc to corner, work 3 dc in each corner) Repeat around. End with sl st in top of first dc. Cut yarn.

Fringe:
For each fringe, cut 4 strands of yarn, each 22” long and fold in half. Make 6 fringes of each color. Attach 12 fringes evenly spaced apart at short end of scarf in the following this order: A-B-C-D-A-B-C-D-A-B-C-D

Sunday, August 20, 2006


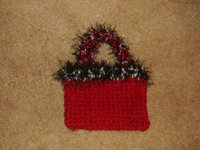
Fur-trimmed Handbag

Materials and Equipment
2 ½ oz Red worsted weight yarn
2 ½ oz Red Heart Plush yarn in Spice
1 ½ oz black and white combo fur yarn
crochet hooks sizes J, L

Gauge: 6 sc = 2 inches (with worsted weight and Plush yarns together and crochet hook size J)
6 rows = 2 inches


Directions

Front of purse (using crochet hook size J):
Use one strand of worsted weight yarn and Plush together.
Ch 25 loosely
Row 1: Sc in second ch from hook and in each ch across. 24 sc.
Rows 2-15: Work even in sc. 24 sc.
Cut yarn and weave in loose ends.

Back of purse:
Working on other side of beginning ch, crochet as follows.
Row 1: Join with sc in first st, sc in each ch of beginning row. 24 sc.
Rows 2-15: Work even in sc. 24 sc.

Sew side seams. Attach fur yarn to first sc after side seam. Work on sc in each sc around. Crochet a second round of sc.

Handles (make 2 using crochet hook size L):
Holding one strand of each of the three yarns, ch 50. Sl st in second ch from hook and in each ch across. Cut yarn leaving a long enough tail to sew strap to purse.

Finishing:
Position ends of handle approximately 2” in from side seams and sew to inside of purse just below fur trim. Weave in loose ends.

Sunday, August 13, 2006


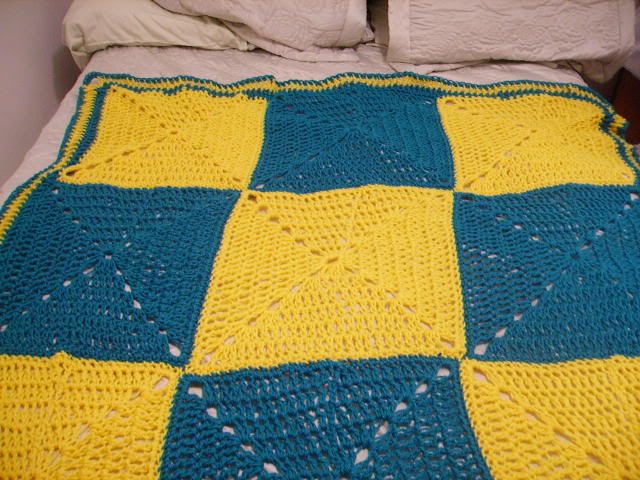
Big Blocks Afghan

Materials and Equipment
Lion Brand Chunky USA yarn
6 skeins of color A (Gulf Green, in this case)
6 skeins of color B (Yukon Gold, in this case)
Crochet hook size Q

Gauge: Rounds 1- 3 = 9 inches

Finished afghan is approximately 60” x 80”

Directions

Square: Make 6 with color A and 6 with color B

Ch 4. Join to form ring.
Round 1: Ch 3 (This counts as first dc in this and every dc round.), 3 dc, ch 2, (4 dc, ch 2) 3 times in ring. Sl st to top of beg ch 3 to close this and all dc rounds.
Rounds 2-6: Dc in each dc, (2 dc, ch 2, 2 dc) in each corner space.
Round 7: Ch 1, sc in same st as joining, sc in each dc, 5 sc in each ch 2 space. Sl st to top of first sc to close. Cut yarn.

Sew squares together alternating colors in a 3 x 4 checkerboard fashion matching stitches beginning with middle sc of 5 sc group and ending with middle sc in next 5 sc group. Sew through both loops of the final round when sewing squares together. You should have one row of squares as follows: green, gold, green. The next row should be gold, green, gold. The next row should be green, gold, green. The final row should be gold, green, gold.

Edging
Round 1: Join color A in middle stitch of 5 sc group in any corner square. Ch 3 (counts as first dc in this and next round of edging.), dc in each sc and joining between squares, (2 dc, ch 2, 2 dc) in each of the four corners of the afghan (middle sc of the 5 sc group). Sl st to top of beg ch 3 to close this and next round of the edging.
Round 2; Using color B, repeat Round 2 of square.
Round 3: Using color A, repeat Round 7 of square.

Finish off and weave in loose ends.

Friday, August 04, 2006


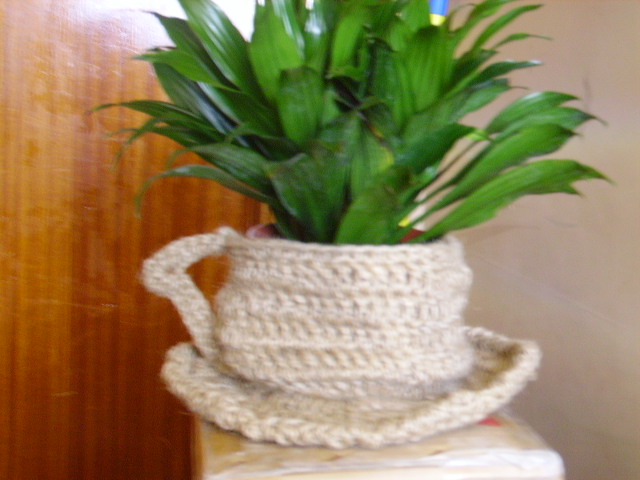
Coffee Cup Plant Holder

Materials and Equipment
Ø 150 yards of jute twine
Ø Crochet hook size K
Ø 6-7 inch diameter potted plant or any potted plant that fits snugly inside crocheted cup


Gauge
Rounds 1-3 = 3 inches


Note: Jute twine can be messy to crochet with sometimes. Bits of the fiber will flake off around your work area and it can be itchy on your fingers as you crochet.


Directions

CUP:
Ch 4, join to form ring.
Round 1: Ch 1, 8 sc in ring. Sl st to top of first st to close this and all rounds. 8 sc.
Round 2: Ch 1, 2 sc in same st as joining and in each st around. 16 sc.
Round 3: Ch 1, sc in same st as joining, 2 sc in next st, *1 sc in next st, 2 sc in next st.* Repeat between * * around. 24 sc.
Round 4: Ch 1, sc in same st as joining, 2 sc in next st, *1 sc in each of next 2 st, 2 sc in next st.* Repeat between * * around. 32 sc.
Round 5: Ch 1, sc in same st as joining, 2 sc in next st, *1 sc in each of next 3 st, 2 sc in next st.* Repeat between * * around. 40 sc.
Round 6: Ch 1, sc in same st as joining, 2 sc in next st, *1 sc in each of next 4 st, 2 sc in next st.* Repeat between * * around. 48 sc.
Round 7: Working in back loops only, ch 3, dc in same st as joining and in each st around. 48 dc.
Rounds 8-10: Working in both loops, repeat Round 7. 48 dc.
Round 11: Ch 3, sc in same st as joining, 1 dc in each of next 5 st, work dec as follows (yo, insert hook in next st, pull up 1 loop, yo, pull through 2 loops, yo, insert hook in next st, pull up 1 loop, yo, pull through 2 loops, yo, pull through 3 remaining loops), *1 dc in each of next 6 st, dec,* Repeat between * * around. 42 dc.
Round 12: Ch 1, sc in same st as joining and in each st around. 42 sc. Do not cut yarn. Continue with handle.

HANDLE:
Ch 15, join to bottom of Round 7 with sl st. Turn.
Work 2 sc in each of first 3 ch, 1 sc in each of next 7 ch, 5 sc in next ch, 1 sc in each of last 4. Sl st to top of coffee cup. Cut yarn and weave in loose end.

SAUCER:
Round 1: Working in unworked loops of round 7 of cup, join twine at bottom of cup (with open side of cup facing you) in any st, ch 3, dc in same st as joining, dc in each of next 4 unworked loops, 2 dc in next loop, *dc in each of next 5 loops, 2 dc in next loop.* Repeat between * * around. 56 dc.
Round 2: Ch 3, dc in same st as joining, 1 dc in each of next 5 dc, 2 dc in next dc, *dc in each of next 6 dc, 2 dc in next dc.* Repeat between * * around. 64 dc.
Round 3: Ch 3, dc in same st as joining, 1 dc in each of next 6 dc, 2 dc in next dc, *dc in each of next 7 dc, 2 dc in next dc.* Repeat between * * around. 72 dc.
Round 4: Ch 1, work one round of crab stitch around. Cut yarn and weave in loose ends.

Press with an iron to smooth out the handle. Place potted plant inside cup.
You can play around with the hook size and number of single crochet rounds to adjust the size of the holder or you can use different yarns and a strong starch solution to set its shape.

Saturday, June 24, 2006


A gift

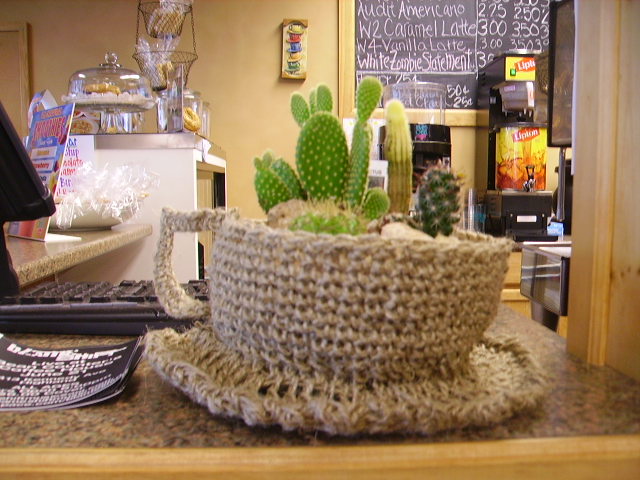
I wanted to thank Bean Counters for being so kind as to allow us to meet in the coffee house. This is what I came up with. I took some twine and crocheted a large cup of coffee on a saucer. Then I purchased a cactus plant that, luckily, fit the cup perfectly. See the picture? I think I'll make another and keep track of how I crocheted it so I can put the pattern on the blog.

Monday, March 20, 2006


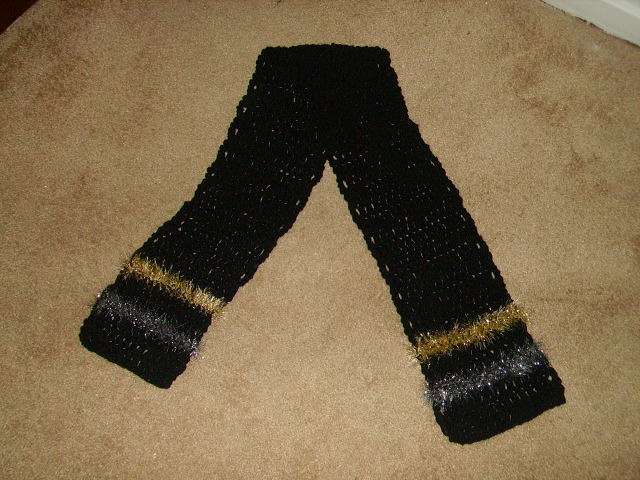
Crocheted Four-hour Scarf

Materials and Equipment

3 oz worsted weight yarn in black
3 oz Red Heart Plush yarn in black
1 to 2 oz gold eyelash yarn
1 to 2 oz silver eyelash yarn
Crochet hook size P

Note: To exchange yarns for stripe, work dc leaving two loops on hook, drop Plush yarn and replace with eyelash yarn. Draw worsted weight and eyelash yarn through last two loops of stitch.

Directions

Working with worsted weight yarn and Plush yarns together, ch 18.
Row 1: Dc in 4th ch from hook and in each remaining ch. 15 dc.
Row 2: Ch 3 to turn (this counts as first dc at beg of each row), dc in ea dc across. 15 dc.
Row 3: Repeat Row 2. Exchange silver eyelash yarn with black Plush yarn on last dc.
Rows 4-5: Work even in sc. 15 sc. At end of Row 5, exchange black Plush yarn with silver eyelash yarn.
Rows 6-7: Repeat Rows 2 and 3. At end of Row 7, exchange gold eyelash yarn with black Plush yarn.
Rows 8-9: Repeat Rows 4-5. 15 sc. At end of Row 9, exchange black Plush yarn with gold eyelash yarn.
Rows 10-52: Work even in dc. 15 dc.
Row 53-54: Repeat Rows 8-9. 15 sc.
Rows 55-56: Repeat Rows 2 and 3. 15 dc.
Rows 57-58: Repeat Rows 4-5. 15 sc.
Rows 59-61: Work even in dc. 15 dc. Finish off.

Weave in loose ends.

Monday, March 13, 2006

tryin' to spread the word . . .
about our group. peggy from schererville joined us today. she brought along a ripple afghan she started about 10 years ago. she read about us in the newspaper and decided to come by.
i decided to e-mail friends and family and ask that they pass the word about the group.
keeping my fingers crosssed.

Monday, March 06, 2006


Rectangle Purse


Materials and Equipment

Crochet hooks, size J and L
Lion Brand suede yarn
1 ball garnet or the color of your choice (A)
1 ball eggplant or the color of your choice (B)

Gauge (with J hook) 7 sc = 2 inches
3 rows = 1 inch

Finished dimensions approx. 7” square


Directions
Note: To change colors, draw new color through last 2 loops of sc.

Purse (make 2)
With yarn A, Ch 11.
Row 1: (outside of purse) Sc in 2nc ch from hook and in next 8 ch, 5 sc in last ch. Working on opposite side of beg ch, work 9 sc. Change to B. Ch 1 to turn.
Row 2: Working with B, 11 sc, ch 1, 3 sc in next sc, ch1, 11 sc. Ch 1 to turn.
Row 3: 11 sc, 3 sc in ch 1 space, 3 sc, 3 sc in ch 1 space, 11 sc. Change to A. Ch 1 to turn.
Row 4: 12 sc, 3 sc in next sc, 5 sc, 3 sc in next sc, 12 sc. Change to B. Chi 1 to turn.
Row 5: 13 sc, 3 sc in next sc, 7 sc, 3 sc in next sc, 13 sc. Ch 1 to turn.
Row 6: 14 sc, 3 sc in next sc, 9 sc, 3 sc in next sc, 14 sc. Ch 1 to turn.
Row 7: 15 sc, 3 sc in next sc, 11 sc, 3 sc in next sc, 15 sc. Ch 1 to turn.
Row 8: 16 sc, 3 sc in next sc, 13 sc, 3 sc in next sc, 16 sc. Ch 1 to turn.
Row 9: 17 sc, 3 sc in next sc, 15 sc, 3 sc in next sc, 17 sc. Ch 1 to turn. Fasten off.

Edging
Hold both pieces with outsides facing out. Working through both sides at the same time, join A in upper left sc.
Row 1: Ch 1, sc in same stitch and in next 17 sc (down the left side of the purse), 3 sc in next sc (corner), 17 sc, 3 sc in next sc (corner), 18 sc. Fasten off. This is the front of purse.

Purse opening
Join B in sc at end of Row 9 of front. Sc in end sc of every row and in beginning ch of one side and continue on other side of opening. Sl st to first sc to close. 38 sc. Fasten off.

Strap
With front of purse facing you and using hook size L and one strand of A and one strand of B, join yarn with sl st to third sc of bottom right corner of purse on edging row. Sl st in next 17 sc (going up the side of the purse), ch 70, sl st in remaining sc of edging on the left side of the purse beginning with first sc of edging row. Sl st to first sl st of strap. Weave in all loose ends.

Purse can be made larger by following established pattern. Purse can be stopped after Row 4 to make cell phone holder. Pockets can be added by working one side of purse until desired pocket size is achieved. Whip stitch pocket to inside or outside of purse after finishing.

Purse can be made all in one color with different colored trim (see purses post) and a flap closure.
Flap closure Row 1: Same as Row 1 of purse.
Row 2: Ch 1, 11 sc, ch 3 (buttonhole), skip next sc, 11 sc
Row 3: (front of flap) Ch 1, 11 sc, 7 sc in ch 3 space, 11 sc.
Sew flap to middle 7 sc of back of purse. Sew button on front to match buttonhole.

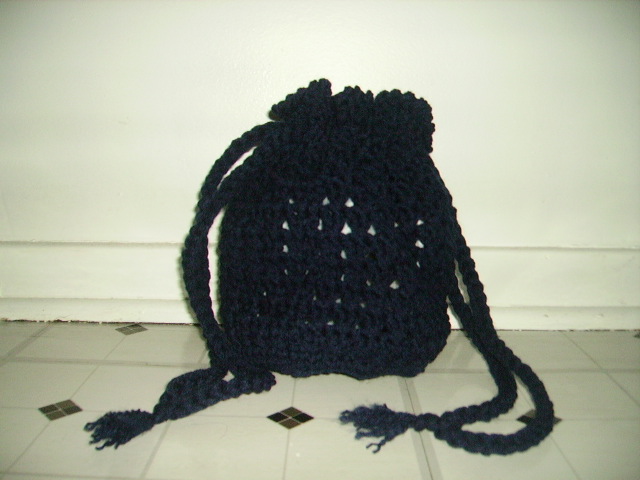
Drawstring Purse


Materials and Equipment

Crochet hooks, size I and K
3 oz. of worsted weight yarn

Gauge (with I hook) Rounds 1-5 = 3 ¼ inches

Directions

Purse
Ch 4. Sl st in first ch to form loop.
Round 1: Ch 1, 8 sc in loop. Sl st to top of first sc to close. 8 sc.
Round 2: Ch 1, 2 sc in each sc. Sl st to top of first sc to close. 16 sc.
Round 3: Ch 1, 2 sc in first sc, 1 sc in next sc, (2 sc in next sc, 1 sc in next sc) around. Sl st to top of first sc to close. 24 sc.
Round 4: Ch 1, 2 sc in first sc, 1 sc in each of next 2 sc, (2 sc in next sc, 1 sc in each of next 2 sc) around. Sl st to top of first sc to close. 32 sc.
Round 5: Ch 1, 2 sc in first sc, 1 sc in each of next 3 sc, (2 sc in next sc, 1 sc in each of next 3 sc) around. Sl st to top of first sc to close. 40 sc.
Round 6: Ch 1, 2 sc in first sc, 1 sc in each of next 4 sc, (2 sc in next sc, 1 sc in each of next 4 sc) around. Sl st to top of first sc to close. 48 sc.
Round 7: Ch 1, 2 sc in first sc, 1 sc in each of next 5 sc, (2 sc in next sc, 1 sc in each of next 5 sc) around. Sl st to top of first sc to close. 56 sc.
Round 8: Ch 1, 2 sc in first sc, 1 sc in each of next 6 sc, (2 sc in next sc, 1 sc in each of next 6 sc) around. Sl st to top of first sc to close. 64 sc.
Round 9: Working in back loops, ch 1 and pull up loop in first 2 sc, yo, pull yarn through all 3 loops on hook (dec mad), sc in next 6 sc, (dec, sc in next 6 sc) around.
Round 10: Working through both loops, ch 1, work even in sc.
Round 11: Ch 3 (to raise yarn to proper level), skip first st, dc in next st, dec in skipped st, (skip next st, dc in next st, dc in skipped st) around. Sl st to top of first dc (not the ch 3).
Rounds 12-20: Repeat Round 11.
Round 21: Ch 4 (counts as fist dc plus ch 1); (skip next dc, dc in next dc, ch 1) around. Sl st to rhird ch of beg ch 4.
Round 22: Ch 3 (counts as first dc), dc in each dc and ch 1 space around.
Round 23: Work one round of crab stitch. Weave in loose ends.

Straps (Make 2)
With hook size K and using 3 strands of yarn, ch 80. Cut yarn.

Weave one strap through ch 1 spaces of Round 21. Weave second strap through ch 1 loops of Round 21. Make sure middle of second strap is at beginning (same ch 1 space) of first strap. Tie ends of straps and use sewing needle to fray ends of straps to make tassels.

Purse can be lined and top of lining sewn to purse at top of Round 20.